Tuesday, January 03, 2012

Food Thongs... er.. Tongs...

I'm working on a cookie bar for a friend's wedding and I want to get some small tongs. So I googled Food Tongs. Except I typed Food THONGS... 

Just a sampling of what came up:

Source
Funniest find of the week! These must have been hilarious to make!

Which one's your favourite?

Monday, January 02, 2012

A Not So Christmas-y Ornament Wreath

I love all the different kinds of wreaths out there. From coffee filter wreaths to felt wreaths (I want to try this one year!) to ornament wreaths, there are so many options! 

Although Christmas has come and gone, it doesn't mean you can't still make them!

I made this one for my niece's 100 day celebration:

Life: Designed
I love how it turned out! It was a bit of an uncertain process but all in all it was a success.

Word to the wise: Attach your ribbon FIRST! Before adding any ornaments, make sure you do this. Or at least consider how you're going to hang the wreath. After the wreath was done, I had to shimmy a ribbon between the ornaments using a skinny stick- not a great idea. 

I wasn't able to find a reasonably priced styrofoam wreath in the size that I wanted so I settled on this from Michaels. Using my 40% off coupon, it cost about $5.


Life: Designed
Of course I had to cut out the donut in the middle but that was not big deal especially since the ones already pre-cut were about twice the price. 


Now it was time for the ornaments! I started my shopping for the decor right before Christmas so I found a lot of good deals! 


These paintable ornaments were 1/2 off at Deserres. $8.49 for 39 assorted sizes. Sold!


Life: Designed
With some pink, silver and white spray paint, these were ready to go! 
It sounds easy enough but spraying round objects can be quite time consuming. I hung them on a wooden dowel I had lying around and did many light coats. Sometimes the paint would run and cause unsightly streaks and bubbles... It's important to keep the coats really light and dry fully between coats. I tend to be too impatient AND I have a heavy hand...but I'm working on that. =)


THEN, I flipped them over, stuck them into the left over styrofoam and sprayed the bottoms. 


Life: Designed
See all the imperfections? Don't fret. Just keep doing light coats...I think it took about 4-6 coats to get them to look like this:


Life: Designed
A lot more bubble gum pink than I wanted, but that's okay!


Now comes the fun part! Take off all the metal tips and starting with the largest ornaments, hot glue gun them to the wreath.


Life: Designed
Then keep going down in size. You'll use the smallest ornaments at the end to cover any holes.


Life: Designed
So by now I was getting worried for 2 reasons...
1) I've already used half the ornaments...I even made the donut large to reduce the amount of ornaments needed.


2) This didn't look anything like this:


Source
It didn't even look like a circle...but I just kept at it. It would all work out in the end right?


But before I could do anymore, I went out and got more ornaments. This wreath was adding up...


Luckily I found these great little ornaments at Michaels. Originally $8.49... on clearance for $1.49! All they needed was some spray paint... Can you tell I love spray paint? They actually had silver ones but they weren't on sale. =(

Life: Designed
These were easy to spray paint. What I was dreading was having to spray paint another 35 ornaments... (Even thought they come in white, they were a translucent cheap plastic that definitely needed a coat or two of white paint).


On a whim I dropped by Superstore and lo and behold I found these babies:


Life: Designed
They were all marked down to just $3 each. I love the variety of silvers and all the different textures these were going to give the wreath in conjunction with the ones above. 


Life: Designed
I love how it turned out! 

I was worried that I didn't have enough pink ornaments, but since the pink is SO bubble gum pink that a little goes a long way.

I think I'll make this type of wreath for my sister next Christmas to replace the coffee filter wreath I made for them this year!


The total cost of this was about $30 and that accounts for all the ornaments, the styrofoam base, hot glue gun sticks and spray paint.

Looking at Etsy, they cost about $50. So you're not saving a whole lot by making it yourself when you also consider the time it takes to make it.. but it's fun to make and you can amaze all your friends and family by saying you made it yourself!

Sunday, January 01, 2012

A Brand New Year

Happy New Year!

As I mentioned yesterday, my niece had her 100th day celebration yesterday. We held it at my brother in law's church and I did a wee bit of decorating. It's kind of a trade off I guess since I am but a poor starving student... I offer my time and crafty hands to do some decorating and that is my present to the child. Hopefully one day they'll see all the pictures and see how much I love them! 


I currently have 3 nephews and 1 niece- all under the age of 5. SO much fun!!

Timing was perfect because I'm on break from school so I actually had time to make some decorations.


Life: Designed
Being the only girl on our side of the family, it's fun to go all out girly! 


I'm really happy with how the wreath turned out. I've wanted to try this type of wreath for Christmas for a while and since her party is so close to Christmas I thought it would be okay to go with some Christmas-y decor but with a pink twist of course! I'll post the process of this wreath later this week. It didn't take very long but it required a lot more balls than I thought! I think everyone who has made this wreath says the same thing! =)


I used left over coffee filters from this coffee filter wreath project to make the letters of her name. They were probably my least favourite decor item I made for this party... 
It was hard to control the puffiness of the filters and I don't like how it looks with the white dollar-store-table-cloth-turned-backdrop. If I had been smart, I would have either used a pink backdrop or outlined the letters in pink. I think more pink would have made everything look less "wedding like".


The paper rose topiaries turned out nicely! Again... a bit on the wedding side... A lot of people said it looked like Mia's getting married! Yeah.. maybe not quite baby-like but I wanted to try making these and I thought they would be pretty. 
Although I like how they turned out but...I probably won't be making these again.
I think Mia should keep these for 20+ years and use them at her wedding! Ha Ha that would be awesome! And impressive if they can keep these to last that long!


The branch in the vase is something trendy that I wanted to add. I don't know where to get Manzanita branches in Vancouver so I looked around for branches on the street! My friend and I were killing time before watching a movie and we came across an abandoned stretch of property with lots of tree branches. Good thing it's the dead of winter... 


When I took it home, the first thing I saw was this:


Life: Designed
Funny how we don't see what's right in front of us sometimes!
So I threw out the branch I had just picked up (it wasn't quite right anyways), got an Xacto knife and gave this tree a little trim. 


I gave it a light coat of white spray paint and hung the left over balls from the wreath. Now I know why people invest in Manzanita branches.. they are much sturdier than branches you'll find around your neighbourhood. As light weight as the Christmas ornaments were, they were still causing the branches to sag a little bit. I had to be careful where I placed them. 


Life: Designed
Isn't the cake so cute? We hired my friend to make it and I think she did a great job! The figurines are Moshi Maro (Korean) and Pucca (Chinese) cartoon characters. Perfect since we are Korean and my brother in law is Chinese. 


Life: Designed


The Grandmothers made all the food and everything was so delicious!


Life: Designed
The table cloth backdrop is killing me... Ha Ha..What can you do...

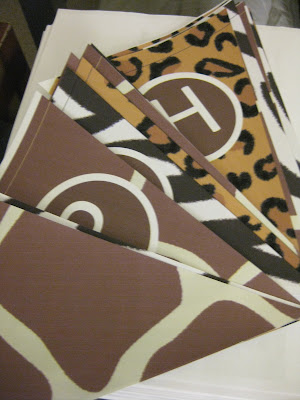
Next party... My nephew's turning 2 on January 9th! My sister and brother in law are having a small gathering with just family and a couple close friends this Saturday. Here's a sneak peek at some of the decor I've been working on. Can you guess the theme??  

Life: Designed